Saturday, October 29, 2011

Intimidation over. Jap Chae is served!

Ever since I first tried Jap Chae at Kai's Japanese Restaurant back at home (in Alameda, CA) I've craved it! We were visiting all of our family (we moved to AZ in 07' but all of our family is still there in CA) and we ate at one of the local favorites; Kai's. At Kai's they never fail to amaze me with the quality and taste of their food. I normally get sushi, but this time I got a Teriyaki Chicken Bento Box! Amazing meal!! I decided I had to find out what these noodles were called and I had to re-create them myself! I've been so intimidated to even begin to make them, but now it's different. The more I cook and the more recipes I make, I keep wanting to try new things! So I gathered many Jap Chae recipes, watched YouTube videos with people making the noodle dish, and tried it the first time tonight. SUCCESS!
The Jap Chae Sauce was amazing! The brand is "Wang" but I can't even find a picture of the bottle on Google which is really odd. I'm so glad I found it at the Asian Market though! I highly recommend it!
NOTE: Jap Chae is a traditional Korean dish. Why it was in a Japanese restaurant I don't know, but my in-laws loved mine 10x better than the one at Kai's! :)

Ingredients:
3/4 of a Red Bell Pepper, julienned and cut into 1 inch pieces
3/4 of a Yellow Bell Pepper, julienned 
1 Carrot, julienned into matchsticks
2 Green Onion Stalks, cut in 1 inch pieces
1/2 a small onion, thinly sliced
Toasted Sesame Seeds (as much as you see fit)
250 grams Glass Noodles (which is 1/2 of the 500g bag)
6oz Jap Chae Sauce from the asian market
3 hand-fulls of Fresh Spinach

Directions:
1. Boil the glass noodles in a large pot of boiling water for about 5 minutes and check the texture. If they're done then remove them from the pot and set aside in a bowl (reserving the boiling water). Cut the noodles in a few places because the noodles are very long. Place the spinach into the boiling water for 3 minutes. Drain and set spinach aside in another small bowl.
2. Cook the red/yellow bell pepper, carrot, onion, and green onion in a pan with alittle olive oil. Cook for 4 minutes (until tender but still crisp). Set aside in another bowl.
3. In the pan that you cooked the vegetables in, place the glass noodles into the pan on medium heat and add the Jap Chae Sauce. Stir until sauce covers all the noddles.
4. Add your vegetable mixture, spinach, and sesame seeds into the glass noodles and cook until hot (mixing everything together well).

I need an oil thermometer. Stat.

Tonight for dinner we had an asian feast (courtesy of moi'). I made Jap Chae, Teriyaki Chicken over Steamed White Rice, and I also fried up some of the Springrolls. Well we already know the pork filling is a total WIN, but I'm thinking my oil was too hot. The outside was perfect so I took one out and split it open, but half of it was still raw pork! I kept the others in the oil until they started getting alittle burnt and I just kept on checking if they were done. Finally they were done on the inside, but way too overdone (for my liking) on the outside. I now know I need to invest in an oil thermometer.

The perfect springroll step-by-step.

Take one springroll wrapper and lay it in a diamond-shape. Put a little of your pork mixture at the bottom edge (as shown in the picture).
Roll tightly (starting from the bottom edge) and roll a few times until a triangle shape forms.
Fold in both sides tightly.
Roll the rest until you get to the top edge. Stop.
Dip the tip of your finger in water and wet the whole top tip of the wrapper. Fold over the tip and tightly secure.
VoilĂ ! Perfect Springroll. :)

How to Test Oil Temperature

Deep frying is normally done at between 360 and 375 degrees Fahrenheit and the following methods are designed to indicate when the oil reaches this temperature point
  1. Use the handle of a wooden spoon or a wooden chopstick. When the oil has preheated, dip the handle of a wooden spoon or a chopstick into the oil. If the oil starts steadily bubbling, then the oil is hot enough for frying. If the oil bubbles very very vigorously, then the oil is too hot and needs to cool off a touch. If no or very few bubbles pop up – then it’s not hot enough.
  2. The old Joy of Cooking method – drop a 1 inch square of bread into the oil. If it takes 60 seconds to brown, then the oil is at 365.
  3. The Cooks Illustrated Method – drop a single kernel of popcorn into the oil as you heat it. The kernel will pop as the oil reaches between 350 and 360 degrees. (Remove the kernel, eat it, and start frying)
Remember that no matter what temperature you start at, overcrowding the pan will result in a dramatic temperature drop and oily food – so don’t spend a lot of effort ensuring the correct temperature only to waste your effort by dumping in a mountain of frozen French fries, for example!
As a last resort – buy a deep fry thermometer!

Pork Wonton Mixture. Success!

Ingredients:
1.34 lb. Boneless Pork Shoulder Country Style Ribs
2 tsp. Sesame Oil
2 tsp. Grated Ginger Root
2 tsp. Shao Hsing Rice Cooking Wine
4 tbs. Green Onion, diced
4 tbs. Soy Sauce
2 tbs. Oyster Sauce
2 tbs. Minced Garlic
2 tbs. Cilantro, chopped
1/2 tsp. Sugar
1/2 tsp. Black Pepper
3 cups Slaw Mix (cabbage/carrot)
6 oz. Wing Hing Wonton Wrappers
11 oz. Wei-chuan Spring Roll Wrappers

Directions:
1. Ground pork in a food processor and transfer to a large bowl; add the slaw mix and stir to combine. 
2. In a smaller bowl combine sesame oil, ginger root, Shao Hsing, onions, soy sauce, oyster sauce, garlic, cilantro, sugar, and pepper; Stir after adding each ingredient.
3. Add the wet mixture to your pork mixture and use your hands to thoroughly combine all ingredients.
4. Use Wonton Wrappers if you're making Wonton Soup, or use Springroll Wrappers if you're making Springrolls/Eggrolls/Lumpia/Etc.

NOTE: I made the Wontons with this exact mixture and they turned out amazing!!! I then moved on to wrapping Springrolls (with the same bowl of mixture) but I added one more cup of the "slaw mix" just to add more vegetables.

A note that doesn't matter: I haven't fried up the Springrolls yet (they are in the freezer right now) because one night a.s.a.p. I want to have a whole Asian feast with Springrolls, Wonton Soup, Jap Chae & Steamed White Rice! I want to make Jap Chae sooo bad but I want to eat it with other Asian stuff too (instead of just eating it cold while standing at the refrigerator throughout the coming days). :P So I have to plan this feast! Tonight is Spaghetti and Meatballs though... I think I'll have to switch that around... ;)

I must secretly be chinese...

My second recipe that I made up for Pork Wontons/Springrolls turned out fantastic!!!! I'm talking beyond fantastic! I took some of my wontons from the freezer and made some for lunch for my in-laws and they loved them! This is definitly my #1 Wonton recipe. I am sooooo excited! As/If you recall my first try was basically a FAIL. I didn't let that get me down though; I was determined to make some amazing Wonton Soup and damn it, that's just what I did! I'm so proud of myself :D .
I haven't fried up the Springrolls yet, but let me tell you right now - using actual Springroll wrappers from an asian market is essential! The texture is already so much better than using grocery store bought "Eggroll" wrappers. The liquor store I use to live by was owned by Chinese people and the wife made the best eggrolls you will ever taste in your entire LIFE. It was right by the High School so all the kids bought eggrolls everyday and that's probably how they make a lot of their income! They were indescribable! I can definitely tell she uses Springroll wrappers instead of regular eggroll wrappers. I'm thinking eggroll wrappers would be good for dumplings becuse they're thicker, but for a light crispy springroll? No. That's where Asian Markets come in handy!

When I walked into this Asian Market I just knew; I was home! I literally felt like I had found my calling in life! I'm pretty sure I'd move in if it didn't smell like dead fish. :P The variety of Asian foods were incredible! I couldn't believe my eyes! They had every type of noodle, beef, sauce... AHHH! I don't even know how to explain it! It was just life-changing for me, I swear! I'm in love! <3

Alfalfa Sprouts = LOVE.

I love alfalfa sprouts so much it's not even funny. One time I ordered a sandwich in 2008 from The Coffee Plantation and I thought it would just be a regular turkey sandwich with the usual. When I opened it though, I was surprised to see a grilled turkey sandwich with alfalfa sprouts hangin' out! I decided to give it a try, and with that first bite I was hooked! If I recall correctly it was turkey, mayo, tomato, and alfalfa sprouts on sourdough bread. Maybe some mustard... I don't know... but it was all grilled in a panini press and I just remember it was absolutly life-changing to my taste-buds! It broke my heart when one day I saw they had closed the restaurant for whatever reason. :/ But my love for alfalfa sprouts has never dulled. Here's my favorite sandwich... try it, you'll love it!

Ingredients:
Mayonnaise
Mustard
Oven-roasted Turkey Breast
Tomato, sliced
Onion, thinly sliced
Alfalfa Sprouts, a huge pile
Wheat Bread or Sour Dough Bread

Directions:
1. Put mayo on each slice of bread and alittle mustard on one side of bread.
2. Add the turkey, tomato, onion, and alfalfa sprouts.Top with other slice of bread.
3. Savor. :)

NOTES: It's so yummy with Lay's BBQ chips!


Thursday, October 27, 2011

Weekly Menu 10/26/2011

I'm a day late with this, but I have an excuse (ofcourse) ;) . I made the weekly menu with my mother-in-law and then it turned out to be a FAIL because of random "issues". First I forgot to put my whole frozen chicken in the fridge to thaw,  and then we found out our Costco Orange Chicken (in the freezer) was expired. Then we couldn't have spaghetti because we already had made Masala (which is also a tomato-based sauce) and since my hubby has Chrons Disease he can't have too much tomato-ey stuff or it bothers him. So anyway, here's the menu for now... :)

Weekly Menu 10/26/2011
Wednesday - Mesquite Marinated T-Bone Steak on the Grill, Baked Potatoes, Salad
Thursday - Costco Rotisserie Chicken, Garlic & Onion Fried potatoes, Green Beans
Friday - Shake-n-Bake Pork-Chops, Mashed Potatoes, Steamed zucchini, Salad
Saturday - Spaghetti & Meatballs, Cheesy Garlic Bread, Salad
Sunday - Hubby's Birthday! It's whatever he wants. (probably order pizza from Papa Johns or something)
Monday - Happy Halloween! Sesame Orange Vegetable Stir-Fry over Steamed Rice
Tuesday - Garlic & Herb Buffalo Wings, Pasta-Roni, Salad

Raisins in cole-slaw? Tried it. Loved it!

Hubby and I were lucky enough to take a day trip to Sedona, AZ and we were kid-less! (Thanks to my in-laws!) We haven't been to Sedona since 2007 and this time it was even more amazing than I ever imagined! The colors everywhere, the mountains, the sights, ooooooh it's just something you HAVE to see before you die! Observe... 
Breathtaking... especially when you see it with your own eyes!
Anyway, we ate lunch at a restaurant called The Oak Creek Brewery & Grill and the food was absolutely fantastic! You know, those fancy-shmancy cheeseburgers that cost $13.00 (for ONE burger), and 1 fountain drink is $3.00? Yep... one of those places. These days it's a treat just getting to go through a drive-thru and pick up a few burgers/fries for $10.00! We never get to treat ourselves with such luxury so we decided to go ahead and try the place. Let me tell you... it was fantastic! Every bite I took I never wanted it to end! Their seasoned fries were equally amazing, but let me tell you about this cole-slaw. It was life-changing... it really was. I never thought to try Cole-slaw with apple and raisins, but holy-moly; am I glad I did! I studied the Cole-slaw like it was some sort of experiment... I had to know what was in it!
When the waiter came to ask how we were doing I started raving about the Cole-slaw and he automatically agreed! He told me all the ingredients but I already knew those... I could taste and see them. I just needed to know about the "dressing" it was in! The only thing he said about that was it was a "Home-made mayonnaise base dressing". How depressing... I thought he would go through ALL the ingredients - not just the obvious ones.
I've been craving this cole-slaw ever since the last bite of it so I decided to try and make my own! I now know that making your own mayo-base dressing is key. I tried using Litehouse Cole-Slaw dressing and the taste was just... weir. Not something I'd ever put in my mouth again.But if you like the Litehouse Cole-Slaw dressing then you can follow my recipe! For some reason my husband and in-laws really love this cole-slaw! Maybe it's my pregnancy taste-buds that is the problem?
In any case, you have try try this recipe... I just suggest making your own dressing!
Ingredients:
5 cups pre-shredded cabbage & carrots (Cole-slaw mix)
1/2 jar of Litehouse Cole-Slaw dressing
1 celery stalk, chopped
1 shredded carrot, peeled (there wasn't enough in the Cole-slaw mix)
1 red apple, peeled and chopped
1/2 cup raisins
1/2 tablespoon sesame seeds
1 handful of cilantro leaves, minced

Directions:
Combine all ingredients and pour the dressing in; stir until combined. Keep in the refrigerator until ready to serve.

**Notes: The recipe that I was trying to re-create had golden and regular raisins, and the sesame seeds were black. I also forgot to add the minced red onions. The waiter at the restaurant said the "dressing" base was their home-made mayonnaise, so I will be making my own mayo on my next try.

Saturday, October 22, 2011

Egg-rolls... minus the egg.

I feel funny calling these egg-rolls because there's no egg IN them. Would that technically make them lumpia? Either way, they weren't as good as I imagined. Too much rice-noodle, not enough ground pork. Otherwise they would have been a lot better indeed! Like I said in my post before this though, practice makes perfect! Now I know that there needs to be more meat and veggies, and less rice-noodles in the filling! I'm definitely going to make up a new recipe and attempt these again! This was the first attempt, definitely not the last!
I just found the perfect recipe online for lumpia that I'm going to attempt within the next day or two, so stay tuned!

A whole new appreciation...

I'm on a total Chinese food kick lately, and I finally pushed through the intimidation of cooking a few new recipes! First off, (10/20/11') I made my favorite soup ever; Wonton Soup. It turned out pretty good, but of course I've had better. Practice makes perfect though! How will you ever know what works/what doesn't if you don't TRY?! My advice to everyone who's intimidated by using new ingredients and/or trying new recipes, JUST DO IT. You'll be surprised what you're capable of doing/making! And I have to say right now, I now know why Chinese take-out is so expensive! It's so tedious and time consuming! I'm so glad I actually tried it myself and now have total respect for the hands that make the delicious food I consume (when we get take-out). Also, how they get those flavors to blend so perfectly - I might never know. But as I said, practice makes perfect! This is definitely only the beginning of my journey into Ethnic recipe attempts!
I was contemplating typing up the recipe that I made up, but then realized there's no point since it wasn't that good. I just wanted to post about it since I'm so proud of myself! I've been wanting to try to make Wonton soup for yeeeeears but I've always been intimidated. I'm finally getting a little more comfortable trying new recipes and using new ingredients (example: fresh ginger root!). I'm going to be trying actual recipes (since the one I made up isn't as delish as it could be) and then I'll post the recipe/pics! It made a lot of wontons so I froze many of them and I'll pull out a bag here and there to make some wonton soup. I'd make some right now if I was stuffed beyond belief! (Tonight hubby BBQ'd burgers!)

Wednesday, October 19, 2011

Weekly Menu 10/19/11

I'm doing pretty good staying on track with the menu! My in-laws love my food as much as my husband and I do! I love to cook :) . I think I can keep sticking to my menu each week at this rate! Luckily no one is as picky as I am ;)

For the week starting 10/19/2011
Wednesday - BBQ Mushroom Swiss Burgers (to diiiie for!)
Thursday - Teriyaki Salmon, White Rice & Asparagus
Friday - Crunchy Onion Chicken (the honey-mustard recipe), Parmesan Garlic Fries & Salad
Saturday - BBQ Burgers (we just can't get enough!)
Sunday - Chicken Curry Masala, White Rice & Salad
Monday - Costco Spinach & Cheese Ravioli w/ Buitoni Alfredo Sauce, Cheesy Garlic Bread & Salad
Tuesday - Out for dinner w/ the hubby b/c the in-laws are still here <3

Make my Enchiladas; You'll be a rock star!


Everyone raves about my Enchiladas! I can't ever get enough of them because they are just that darn good! You'll definitely want to make two casserole dishes instead of just one! These are fabulous as left-overs! (And you'll only have left-overs if you make a double batch) :) 

Ingredients: 
Amy's Salsa Chicken
Yellow corn tortillas
1/2 can of Black Beans
1/2 an onion
Black Olives
Lucerne Mexican Blend Cheese
Mild Red Enchillada Sauce
Optional garnish: Cilantro

Directions:
-Saute' onions and add black beans; cook to heat the beans.
-Microwave a plate of tortillas for around 20 seconds to make them pliable (or they will rip when you roll them)
-Hold a tortilla in the palm of your hand and sprinkle cheese down the middle. Add salsa chicken, onion & bean mixture, a few olives, and alittle more cheese.
-Fold in top flaps (to make a "roll") and place the enchillada in a glass baking dish flap-side-down so it won't open up. Continue until glass dish if filled.
-Pour enchillada sauce over down the middle of the top of all the encilladas. Add more cheese on top.
 Cook in a 375° preheated oven for 25 minutes (just to heat through because the chicken is already cooked).
Serve with sour cream, guacamole (or avocado slices), and/or cilantro (as garnish)

*NOTES*
::: In the picture of ingredients there is a bag of Mexican Cheese and also a bag of Cheddar Cheese. That is only because I only had a little Mexican Cheese and of course I needed more cheese (so I grabbed the cheddar bag too). Normally though, I just use the Mexican Blend.
:::  I love to serve these Enchiladas with a side of Spanish rice, corn-on-the-cob, and a few tortilla chips. Perfect plate! :)
::: In case you didn't know to click the name "Amy's Salsa Chicken" to get to the recipe, I'll put the link again... HERE!

Amy's Salsa Chicken

I make the easiest salsa chicken in the slow-cooker that is so delicious! I freeze portions in separate freezer baggies so I can keep having the flavor for weeks/months to come without having to do much work. Sounds good to me! :) Try it, you'll love it!

Amy's Salsa Chicken

Ingredients:
5 frozen boneless-skinless chicken breasts
1 (24oz) jar of Safeway Select Mild Chipotle Salsa
Chili Powder (about 7 shakes depending on taste preference)

Directions:
1. Place chicken breasts into the bottom of your slow-cooker (they will overlap since it's so much chicken).
2. Shake chili powder over the chicken about 7 times.
3. Pour the whole jar of salsa over the chicken; close lid.
4. Cook on low for 6-8 hours, or on high for 4-6 hours (just until it's tender and easily shreds apart).
5. Shred chicken while it's still in the slow-cooker with 2 forks.

NOTES:
This makes a lot of Salsa Chicken and it freezes really well. Place the left-overs in a large bowl and put it in the refrigerator to completely cool (over-night is best). You can then take freezer bags and evenly divide the salsa chicken to have multiple quick dinners on hand. Make sure you push out as much air from the bag as you can before you seal it. Lay your bag flat in the freezer; that way after it's frozen it will only take up a little room, but always be there for Mexican Mondays! ;)

Sunday, October 16, 2011

I'm in a chicken mood.

My in-laws are finally here (yay!) and since they've been driving all day I didn't want to make them run to the grocery store with me for some salmon so we just ate here for dinner. I actually had some wingettes/drumettes thawing in the fridge so I decided to make fried chicken, baked potatoes & salad for everyone. Normally when I make "baked" potatoes I just pop em' in the microwave! Today was a special occasion though so I looked up how long to do it in the oven! They were delicious!!!
Fried Chicken 
Ingredients:
1 bag of thawed drumettes/wingettes (I had a 2.5 lb bag)
About 3 cups of All Purpose Flour
Salt & Pepper to taste
Vegetable Oil (for frying)

Directions:
1. Pour about 3 cups of flour onto a plate and sprinkle with salt and pepper (about 8 shakes with each). Mix with finger tips. 
2. Pour oil into a frying pan about 1 1/2 inches up and turn the heat on to the high setting. 
3. While waiting for oil to preheat, coat each piece of chicken with the flour mixture and place on a clean plate.
4. When your oil is pre-heated (about a good 5 min.) use tongs to gently place each piece of chicken into the hot oil. (Oil should immediately sizzle and bubble around the chicken - that's how you know it's ready for frying)
5. Make sure your pieces of chicken have enough room and do not touch one-another. Don't over-crowd the pan because the temperature will drop quickly. Fry till golden brown (maybe 15 minutes or so... you'll know when it looks like "fried chicken"). 

NOTE: Make sure you have the oven-vent on high. I forgot to turn it on at first and all the alarms started going off in the whole house and we had to open all the windows and turn on the circulation! It was soooo loud and it was after 9pm. I'm sure the next-door neighbor with her newborn baby-girl  isn't very happy with us... lol! :P

Directions for Oven Baked Potatoes: 

1. Preheat oven to 375°.
2. Wash russet potatoes thoroughly and stab each one with a knife 5-7 times (for the steam to escape). Put each potato in a piece of foil and close tightly to make a little pouch (it will steam in the "pouch"). Place on a baking sheet.
3. Bake for one hour and open one up (carefully!) to check if the texture is to your liking. These were pretty big potatoes and they were perfect after one hour. 

NOTE: Top with salt/pepper, butter, sour-cream & green onions for a delicious perfect baked potato!

Saturday, October 15, 2011

One of my favorite dinners. EVER.

There's just something about a perfectly roasted chicken that makes me proud! Buying a rotisserie chicken from the local grocery store is cool if you're in a hurry and have kids to feed, but making it your self gives you a sense of pride! I always feel like Super Mom when I pull that whole perfect chicken out of the oven. The smell is always fantastic and I know we're about to have an amazing dinner! If you're intimidated - don't be. I'm about to tell you exactly what to do to achieve a perfect Rotisserie Chicken right out of your oven! 
Ingredients: 
1 whole 4-5lb. chicken (mine was 4.85lb)
McCormick Rotisserie Chicken Seasoning
1 onion, roughly chopped
2 C. chicken broth
Olive oil
Salt & Pepper

Directions:
1. Take out the insides of the chicken and discard. Rinse the chicken (inside & out) and pat dry with a kitchen towel.
2. Rub olive oil over the whole bird and sprinkle salt, pepper and rotisserie seasoning on the entire outside.
3. Sprinkle rotisserie seasoning around on the inside and stuff bird with the large pieces of onion (until it's stuffed full).
4. Pour chicken broth in bottom of roasting pan and place remaining onion (if you have left-over onion that didn't fit into the bird) at the bottom of the roasting pan.
5. Bake uncovered at 350° for 1 hour and 45 minutes.
6. After timer goes off, take chicken out of oven and cover tightly with foil for 10 minutes.

NOTES: 
:If you don't have chicken broth you can pour 2 cups of water in the bottom of the roasting pan and add 2 chicken bouillon cubes.
:Sometimes I rub butter underneath the skin which obviously adds more flavor. 

Smells like October in here!

Yesterday before dinner I felt like randomly baking. I decided to make a loaf of Pumpkin Bread and it turned out delicious! There isn't a recipe since it was a box mix called Pillsbury Pumpkin Quick Bread but I wanted to share it with you all anyways! It's super simple and delicious! My whole house smelled like Fall, and that's just what I needed to put a smile on my face. :) 

"But the chicken is still frozen..."

I am fully aware that last night was Rotisserie Chicken night, but it wasn't thawed all the way when I went to start dinner. I switched Friday & Saturday's dinner around so we had Tater Tot Bake (casserole) last night! I remember making it years ago but haven't made it since. I now remember why though. It was alright... nothin' special. It was really simple though so I'll probably add it to my monthly dinner menu once in a while since the hubby and kiddos liked it.
Tater Tot Bake
Ingredients
    1 pound ground beef
    1 onion, chopped
    salt and pepper to taste
    1/2 (32 ounce) package tater tots
    1 (10.75 ounce) can condensed cream of mushroom soup
    1/2 cup milk
    1 1/2 cups shredded Cheddar cheese
Directions
    Preheat oven to 350 degrees F (175 degrees C).
    In a large skillet over medium-high heat, brown the ground beef with the onions. Drain excess fat, and season with salt and pepper to taste.
    Spread the beef mixture evenly over the bottom of a 2 quart casserole dish. Arrange tater tots evenly over beef layer. In a small bowl, stir the soup into the milk until smooth; pour over tater tot and beef layers. Sprinkle Cheddar cheese evenly over the top.
    Bake in preheated oven for 30 to 40 minutes, until cheese is bubbly and slightly brown.

Thursday, October 13, 2011

Potato Cheddar Soup

Tonight's dinner was the Slow Cooker Potato Cheddar Soup recipe from the book CROCK-POT: The Original Slow Cooker and it was alright. I'm not sure if it's just my pregnancy-taste-buds that aren't allowing the true yummi-ness to shine through, but for now I'll just say the soup was okay. It looks/sounds a lot better than it actually tastes. Buttered french-bread dipped in it is delicious though! Here's the recipe...
Potato Cheddar Soup

Ingredients:
2 pounds red-skin potatoes, peeled and cut into 1/2-inch cubes
3/4 cup coarsely chopped carrots
1 medium onion, coarsley chopped
3 cups chicken broth
1/2 teaspoon salt
1 cup half-and-half
1/4 teaspoon black pepper
2 cups (8 ounces) shredded Cheddar cheese


 Directions:
1. Place potatoes, carrots, onion, broth and salt in a CROCK-POT slow cooker. Cover; cook on LOW 6 to 7 hours or on HIGH 3 to 3 1/2 hours or until vegetables and tender.
2. Stir in half-and-half and pepper. Cover; cook on HIGH 15 minutes. Turn off hear and remove cover; let stand 5 minutes. Stir in cheese until melted.
Try this soup topped with whole wheat croutons or chives.

P.S.- So-far-so-good on sticking to the weekly menu! Can't wait for my Rotisserie Chicken tomorrow! It's one of my favorites!

I think I'll pass... (Lasagna Follow-Up)

I didn't like my random lasagna for more than one reason. First off, I really don't recommend buying those "no-boil" noodles. Their really thin and they taste like pasty-flour. It's like you can't even tell they're there because they are so thin. They are not something I'll be buying again. Also, I don't know if it's all mental, but thinking about pasta sauce and pizza sauce mixed together makes me sick. The whole lasagna taste was pretty plain-Jane. Here's what it turned out to look like on a plate. (gross)
This morning I asked my husband what he wanted for lunch (to take to work) and I said the lasagna turned disgusting so he wouldn't want that. He said "I don't care, just pack some." So I did just that... and guess what? He comes home and raves about it! He says it's one of the best I've ever made. I'm really confused about this situation because I would never touch it again, but now I guess I have to make one from time-to-time just for him. I should have known - opposites attract. <3

Wednesday, October 12, 2011

Where'd that Lasagna come from?

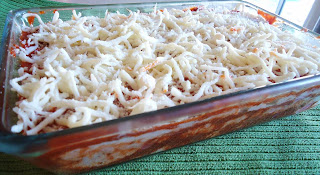
For some reason today I went into the refrigerator, saw some ricotta cheese, and randomly made a lasagna! I then covered it with foil, stuck it in the frige, and didn't even feel like cooking it! Well I was just thinking about it (at 8:30pm) and decided to finally cook it (it's in the oven as we speak)! We had our fried chicken tonight for dinner so I don't even know what I'm doing... I just love cooking and food a little too much. <3
Amy's Random Lasagna

Ingredients:
Some no-boil lasagna noodles
Traditional Prego Sauce/Safeway Pizza Sauce (I didn't have enough pasta sauce so I mixed them)
15 oz. Ricotta Cheese
2 cups Mozzarella
1 cup Parmesan cheese (I used the dry kind you sprinkle on spaghetti)
A few shakes of Italian Seasoning

Directions:
1. Combine Ricotta, Mozzarella, Parmesan cheese and Italian Seasoning in a large bowl.
2. Pour a little sauce at the bottom of a casserole dish and put a layer of no-boil lasagna noodles.
3. Evenly spread some of the cheese mixture over the noodles.
4. Continue with layers (sauce, noodles, cheese mixture) and do it about 3-4 times (depending on how big your dish is and how much of the ingredients you have).
5. When you're finished add some Mozzarella cheese on top and sprinkle with a little Parmesan.
6. Bake covered with foil in a preheated oven at 350° for 50-60 minutes. During the last 5-10 minutes take the foil off so the top browns nicely.

I'll report back with how it tastes after I scarf some down! (A preggalicious girl has the right to eat more than 1 dinner, right?!) :P

Tuesday, October 11, 2011

Sandy's Mexican Chicken

In the cook-book I have called CROCK-POT: The Original Slow Cooker there's a recipe called "Sandy's Mexican Chicken" and it's not only super simple - but also super yummy! It was on my revised menu for October 8 and I was really excited to try it! I recommend it! It's even better as left-overs too!

Sandy's Mexican Chicken
Ingredients:
2 to 4 chicken breasts
1 medium onion, chopped
1 can (10 ¾ oz) condensed Cream of chicken soup -- undiluted
1 can (10 oz) Mexican-style Diced tomatoes with green chiles -- undrained
1/2 lb Velveeta, cubed  

Directions:
1. Place chicken, onion, soup and tomatoes with chiles in Crock-pot. Cover; cook on LOW 6 to 8 hrs OR on HIGH 4 hrs.
2. Break up chicken into pieces. Add Velveeta. Cook on HIGH until melted.
Serve over spaghetti (I served it over bow-tie pasta)

*NOTES*: I used 2 large chicken breasts but wished I used 3 after I saw all the sauce it made!
Also, I shredded the chicken alittle TOO much. Next time I'll leave bigger "chunks".

Weekly Menu

As I stated in the previous post my in-laws are coming for a couple weeks, so there's no way I'm writing these next few weeks of menus in stone. Their coming Oct. 16th so let's see if I can at least stick to my menu till then!

For the week starting 10/12/2011
Wednesday - Fried Chicken, Chicken Rice-a-Roni & Steamed Zucchini
Thursday - Potato Cheddar Soup (in CROCK-POT: The Original Slow Cooker )
Friday - Rotisserie Chicken, Mashed Potatoes w/ pan-gravy & Green Beans
Saturday - Tator-tot Casserole & Salad
Sunday - Teriyaki Salmon, White Rice & Salad
Monday - Amy's Salsa Chicken Enchiladas, Spanish Rice & Corn on the cob
Tuesday - BBQ Burgers & Baked Beans

I did it!

I stuck to my revised second-half of the week's menu (for the most part) which is great for me! Tonight's Fettuccine Alfredo dinner was delicious. :) I had left-over chicken from Sunday night's dinner so I decided to incorporate it.  I find that no matter what I add to the dish  I always resort back to just the sauce and noodles. I've tried putting vegetables in it, then I tried it with shrimp, and now with chicken in it. Hubby and I still prefer good ole basic Fettuccine Alfredo. I refuse to eat any other brand of Alfredo Sauce other than Buitoni! Nothing else compares! I was in a salad mood (my plate is with the Ranch, hubby's is with Italian) so instead of the zucchini we had salad. Also instead of the garlic knots I decided to have sour-dough bread (from the Safeway Bakery) and spread my Home-Made Basil Butter on it! Deeeeeelish!

Now onto a new challenge... my in-laws will be visiting for a few weeks starting Oct. 16th. I planned most of our meals but I know there's no way we'll stick to them every night. A few nights I know we'll get take-out, and another few nights hubby and I will get to go on a date-night while the in-laws watch the girls! I'm really excited for that! I miss spending time with him alone. I also miss my mother-in-law and father-in-law! I can't wait to see them! They are just such amazing people... I'm so blessed to have them in my life! :)
(Now how many people can say that about their in-laws? :P )

Home-Made Basil Butter

I'm lucky enough to have 3 big bushes of basil right in our backyard! Now that I have a food-processor I thought it would be a perfect time to give the bushes a "hair-cut" and make some home-made basil butter! Here's all that I picked (which is nothing compared to still what's outside...)
The whole kitchen had a beautiful aroma of fresh picked basil. It actually made me wonder if they sell basil air-freshener or candles! :P
My first attempt at basil butter turned out excellent! I highly suggest you make some and put it on anything from chicken - to grilled veggies!
Here's the a picture of my "logs" hardening in the fridge, and the recipe follows!
 Home-Made Basil Butter 

Ingredients: 
2 cups basil, loosely packed
1 stick salted butter, softened
4 garlic cloves
1 tsp. lemon juice
1 tsp. black pepper


Directions:
In a food processor chop garlic cloves. Add your basil and blend into little chopped pieces. Add butter, lemon juice and black pepper. Blend till incorporated. Drop basil butter onto saran wrap and roll into logs (like in my picture). Put in fridge to harden. 


**NOTE:** 
Each log is the entire recipe, so 1 stick of butter equals 1 log of basil butter. I did 2 batches so I have 2 logs. 
ENJOY!

Saturday, October 8, 2011

An easy crust I actually like!

I came across a pizza dough mix at Safeway and of course had to try it. Just add water? Now that's the kind of recipe I like! :P
The brand is Betty Crocker and it's actually yummy. I made pizza for lunch today (per my daughters request) and we really enjoyed it!
Here's what I did...

Ingredients:
1 bag of Betty Crocker Pizza Dough Mix
1/2 jar Safeway Select Pizza Sauce
1 1/2 cups Mozzarella Cheese, shredded
Garlic Powder
Italian Seasoning
Hormel Pepperoni
Mushrooms

Directions:
1. Pour pizza dough mix and 1/2 cup hot water in a medium size bowl; stir until dough ball forms. Cover and rest for 5 minutes.
2. Spray olive-oil onto pizza pan to prevent sticking and press the dough out evenly with floured finger tips.
3. I seasoned the dough at this point with garlic powder and Italian seasoning just for added flavor. I then spread 1/2 a jar of pizza sauce evenly onto uncooked pizza dough and added mozzarella cheese, pepperoni & mushrooms. 
4. Bake on bottom rack of preheated oven at 450° for 12 minutes. Take out and let rest for a few minutes.

Okay, let's see if I can stick to this...

Here is my revised menu for the week starting 10/5/2011. Let's see if I can actually stick to the rest of it.

Wednesday - Shake -n-Bake Pork Chops, Baked Potatoes, Green Beans
Thursday -
Slow Cooker Pot Roast
Friday -
Crunchy Onion Chicken, Garlic-Rosemary Steak Fries, Salad
Saturday - Sandy's Mexican Chicken over pasta, Salad
Sunday - Rotisserie Chicken, Mashed Potatoes, Steamed Broccoli
Monday - Fried Tacos
Tuesday -
Fettuccine Alfredo, Garlic Knots, Steamed Zucchini

Friday, October 7, 2011

OrgJunkie's Meal Plan Monday

I love this site! I get so many great tips from Laura about menu planning (and a lot more other stuff)! I want to link up with her so I can start getting subscribers so let's hope I can figure out how to do this!
Meal Plan Monday

Thursday, October 6, 2011

Well, talk about a big FAIL...

It's only Thursday and basically my whole weekly menu is already out the window! Today was supposed to be Eggplant Parmesan but I realized we have no Ricotta Cheese or Mozarella! Not only that, but I was starving and having an anxiety attack about food around 10am so I broke down and made my favorite comfort food - Spaghetti <3. After I ate the spaghetti I felt weird (3rd rimester Woes... tomato sauce gives me bad heart burtn right now). Anyway, since I knew I was over tomato sauce for now and we had no cheese anyways then my lasagna was a FAIL.
              I then saw that my pot roast (thawing in the frige) was already thawed, but that's not on the menu till 10/9! Well I'm weird about "old" food so I decided to make the pot roast before it went "bad" (so 10/9's dinner is ruined too). Then I remembered I had hamburger meat in the fride that I didn't want to go bad either so I made Sloppy Joes for the girls for dinner. That means 10/11's dinner is ruined too because now I have no ground beef for my Hamburger Helper! I have 2 chicken breasts in the frige that are now thawed also so atleast tomorrow's dinner is still on (Crunchy Onion Chicken). Tomorrow I also have to put the Tilapia in the frige to thaw out for the next night (which will be 10/8 - Seafood Saturday). The Basil-Pesto sauce I have is in the jar from Safeway (the brand is 'Classico') but I only bought it because I didn't know when I'd get my food processor in the mail. You'll be excited to know that it came today! My sister is the best! She ordered me one because she knew I've been wanting one so bad! I've been dying to try recipes that are food-processor-friendly, and now I finally can!!! I can't wait to make Basil-Butter, Pico De Gallo, and different fresh marinades for chicken & fish and such! MmMmM!
              Anyway, now I have to basicly re-do half of my menu so bare with me while I decide what to do...

Slow-Cooker Shredded Salsa Beef

So simple, yet so delicious! I made this in September and froze left-overs for another night. I thawed the Salsa Beef in the refrigerator for a day or two and used it for my burritos on 10/3/11. It was even more delicious than I remembered! You can use the beef in any recipe but I highly suggest you try it in burritos! In the words of Racheal Ray... yumm-o!

Instructions:
1 2-3lb chuck roast (Mine was 2.84 lbs)
1 taco seasoning packet (I used McCormick)
1 24oz jar of salsa (I used Safeway Select Roasted Tomato Salsa)
1 TBS minced garlic (from the jar)
Salt & Pepper

Directions:
1. Salt and pepper entire roast and place into slow cooker.
2. Sprinkle taco seasoning packet over the top of the roast, followed by the minced garlic.
3. Pour salsa over the entire roast and put the lid on.
4. Cook on low for 8 hours. After 8 hours take out the roast and shred with 2 forks. Put the shredded beef back into the crockpot (with the salsa still in there) and continue to cook on low until ready to serve.

Wednesday, October 5, 2011

Weekly menu, & a pat on my back...

I'm really getting better at sticking with what's on the menu, and I must say - I'm proud! DH and I really didn't feel like pork-chops after we started smelling the delicious smell of BBQ burgers outside, but I told him NO. I explained that we wouldn't be very smart to change the menu for the night because then I'd have to re-arrange my whole weekly menu! We (reluctantly) agreed to stick to pork-chops. I'm really glad we did because once again I ended up loving it! My last post talked about a big issue of ours which is being so quick to change the menu for the night based on what we feel like eating at the time. I realized when I stick to the menu and smell the food cooking then I end up being really happy that we had what's on the menu! So that helps a lot thinking back and knowing if I just make what's on the menu then I'll be happy either way!
I've decided for October that I am now going to try out weekly themes! So much fun! Here's what my menu will be based on for the month of October....

October's Weekly Themes:
-Whatev Wednesday ("Whatev" ingredients we have that have nowhere to go in the week like pork chops, or whatever I feel like making that night - it gives more leeway to choose.)
-Italian Thursday 
-Chicken Friday
-Seafood Saturday
-Soup/Slow-Cooker Sunday
(I'll make soup in the SC or use the SC to cook a different dish for dinner)
-Mexican Monday
-Red Meat Tuesday

It makes it a lot less over-whelming to have some "direction" (using the themes) instead of looking at a blank menu and not even knowing where to start! Let's see if I can make it a whole week with sticking to this menu!

For the week starting 10/5/2011
Wednesday - Shake-n-Bake Pork-Chops, Baked Potatoes & Green Beans
Thursday - Meaty Egg-Plant Parmesan Lasagna, Cheesy Garlic Bread & Salad
Friday - Crunchy Onion Chicken, Garlic-Rosemary Oven-Fries & Green Beans
Saturday - Baked Pesto Tilapia, Steamed White Rice & Salad
Sunday - Slow-Cooker Pot Roast & Crusty Bread
Monday - Cheesy Salsa Chicken Skillet & Salad
Tuesday - Lasagna Hamburger Helper, Cheesy Garlic Bread & Green Beans

Tuesday, October 4, 2011

I learned a good lesson lastnight...

Menu plan & stick with it! ;) Lastnight (Monday Oct. 3) my Salsa Shredded Beef Tacos were on the menu and I didn't really feel like eating that. Normally I'd automaticaly wonder what else I can make and what I actually do feel like. Not this time though... I stuck with the tacos and realized that after I start smelling the food then I can't wait to eat it! That's a valuble lesson for me considering how much I change the menu based on what I feel like eating that night. That's what messes my menu up! I'm so proud for sticking with it!
And you'll also be really happy to know that for once I basically stuck with my weekly meal plan! I say "basically" because Saturday mu husband was dead-set on eating my Teriyaki Salmon dish so we had that instead of on Sunday. Then instead of Pot Roast on Sunday he wanted some type of lasagna so I tried a new recipe called Lasagna Rollata al Forno - I made up my own recipe and it turned out great (recipe will follow)! Even my 2 year old (which I normally have to force her to eat anything) asked for more 4 times! My husband and I were astonished!
Tonight is scheduled for burgers (which we normally have every Tuesday) but today we have no buns (and I'm trying to stop going to the store so much) so I'm going to make Lasagna Hamburger Helper, Garlic Bread & Green beans. Sounds good to me! And we already have everything to make it! This is the type of thing that I've been trying to get better at, and I'm happy to say that I finally AM! Normally I'd go to the store for buns and come back with $50 worth of food (which I then have to re-do my whole menu so stuff won't go bad), but not this time! No no... I'm doing good and I'm sticking with it! :)

Amy's Lasagna Rollata al Forno

Ingredients: 
1 box Barilla Lasagna Noodles
32 oz. Kraft Ricotta Cheese
1 jar of Traditional Prego Sauce
2/3 cup frozen spinach, dethawed and drained
2 tbs. fresh chopped basil
2 tbs. dried parsley flakes
1 tbs. salt
1/2 tbs. black pepper
1/2 tsp. italian seasoning
1 tbs minced garlic
Shredded Kraft Mozzarella Cheese

Directions:
1. Bring large pot of water to a boil. Add salt and lasagna noodles. Cook 7-8 minutes till al dente'. Drain. Add alittle olive oil to the noodles to prevent sticking.
2. Add ricotta cheese, spinach, basil, parsley, salt & pepper, italian seasoning & garlic to a large bowl. Stir to combine well.
3. In a 9x13" baking dish pour some pasta sauce to cover the bottom with a thin layer.
4. On a cutting board lay out a few noodles at a time. Spread a thin layer of the ricotta cheese mixture along the top of the noodle. Roll the noodle up and place seem-side down in the baking dish (on top of the sauce).
5. Continue until your baking dish is filled. Add the mozzarella cheese to the top of each lasagna roll.
6. Cover with aluminum foil and bake at 400° for 30 minutes. Then take the foil off and leave in the oven for an extra 10-15 minutes to brown the mozzarella cheese. (You can broil it for a few minutes to further brown the cheese on top)
7. In a small sauce pan on the stove, heat the rest of the pasta sauce left in the jar. When ready to serve lasagna, pour some of the warmed pasta sauce on the plate and set the lasagna on top of the pasta sauce. Garnish with fresh basil if desired.
Serve with garlic dinner rolls and a salad.